
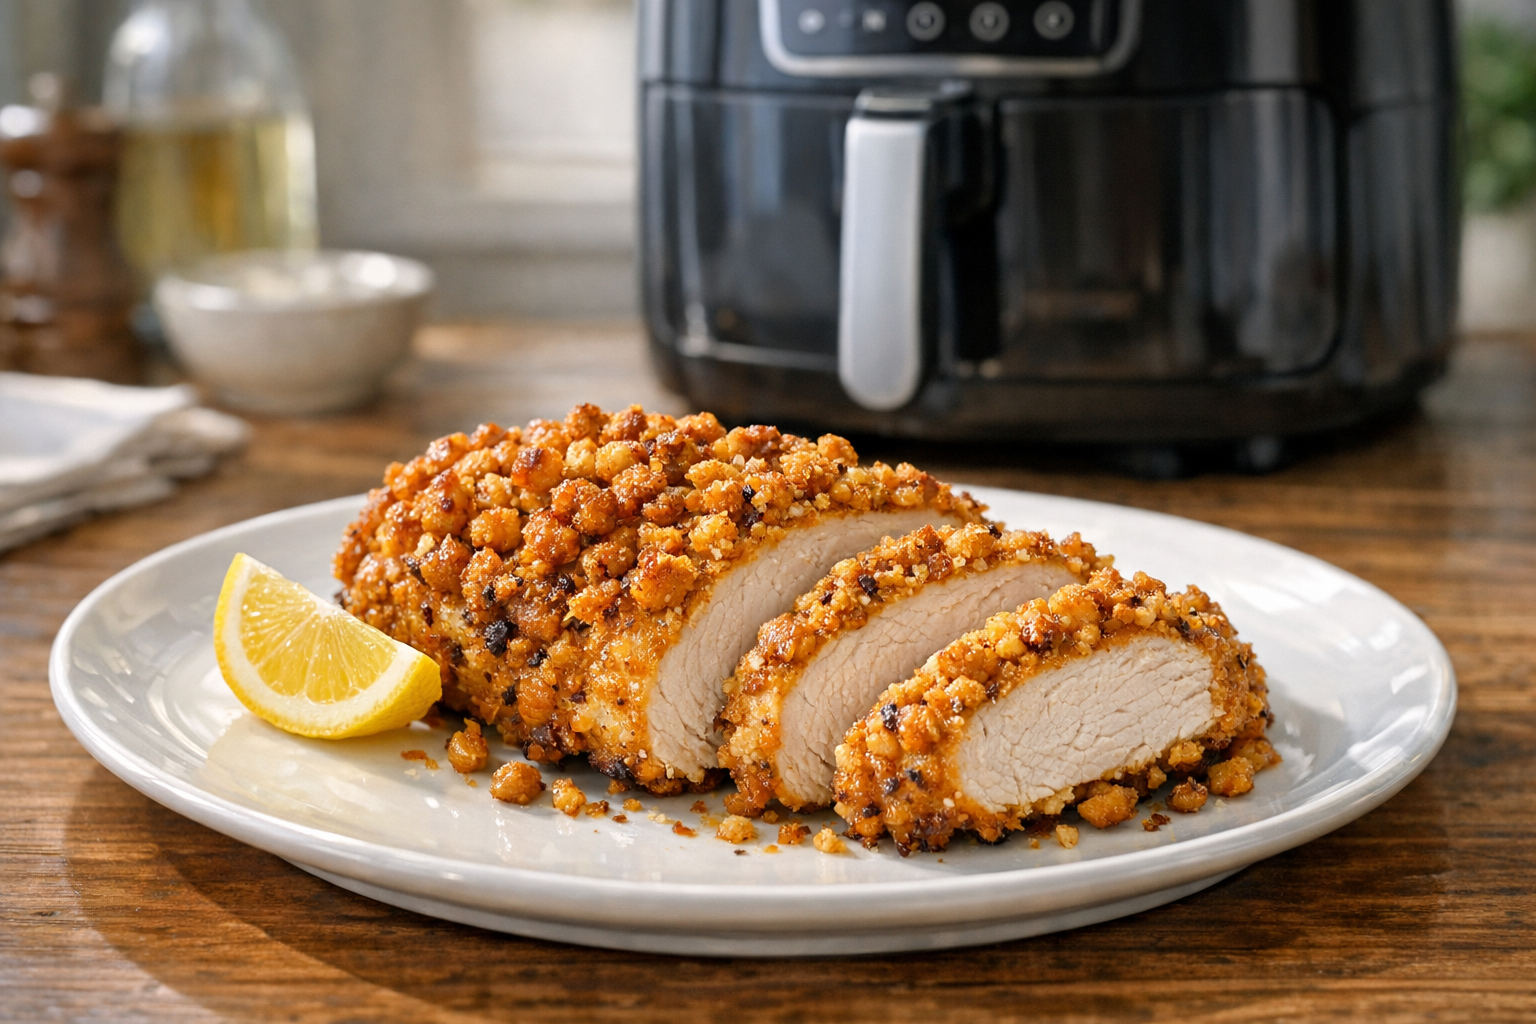
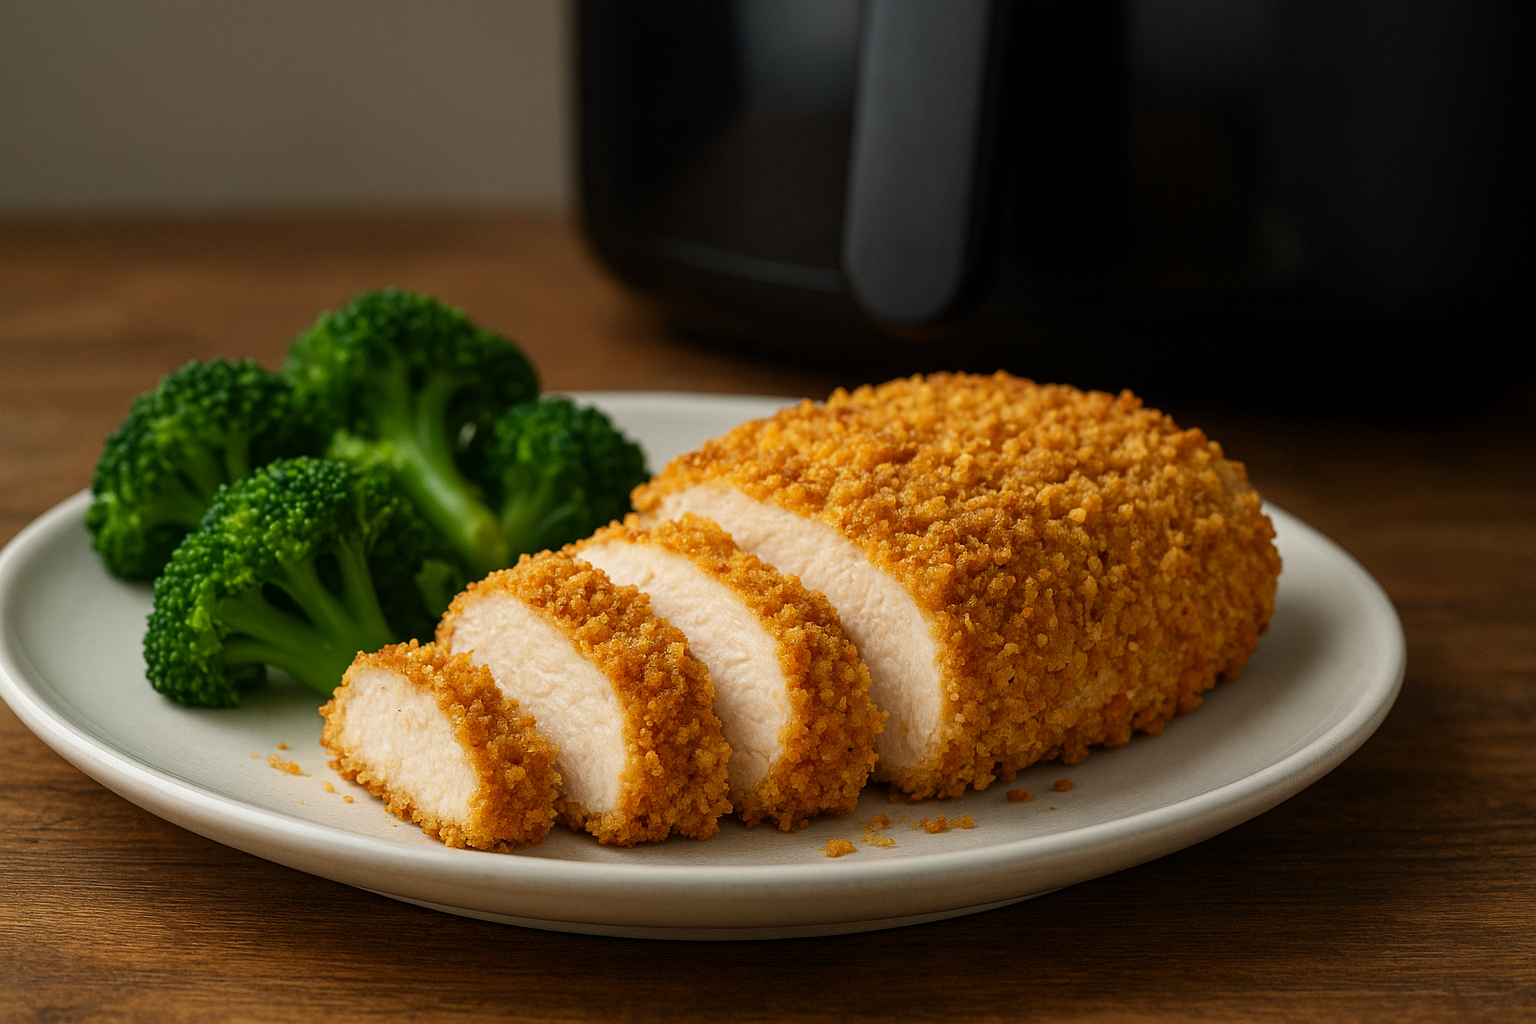
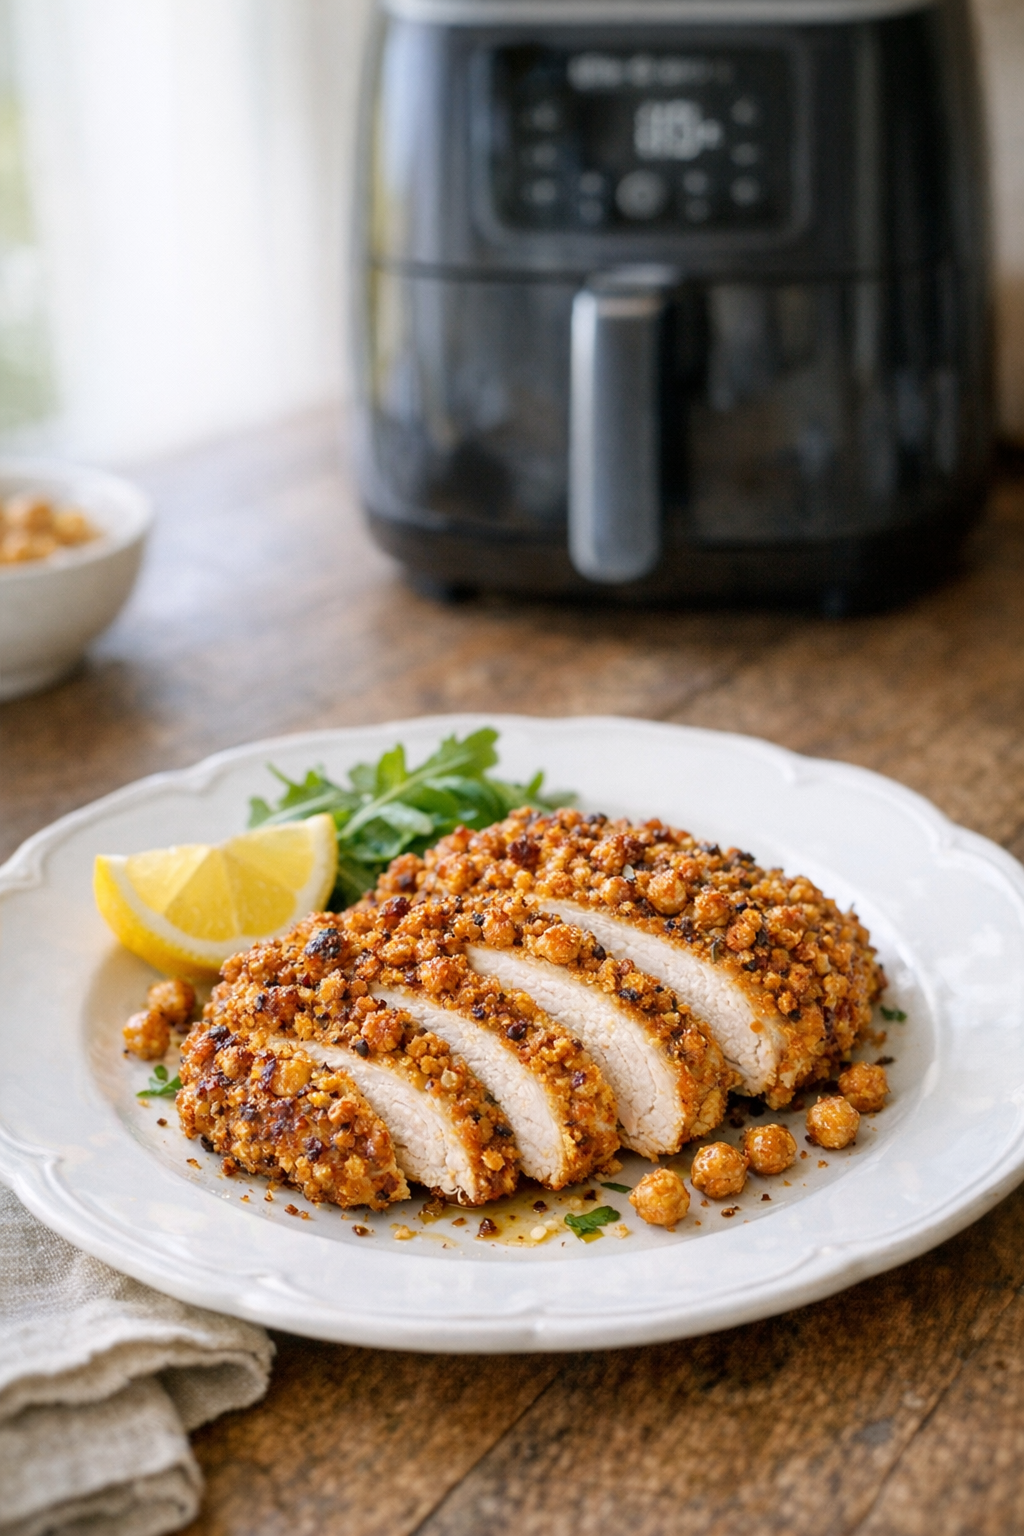
This air fryer chicken breast with crispy chickpea crust is built for weeknights: a crunchy coating, tender chicken, and a short ingredient list that leans on pantry staples.
Why This Air Fryer Recipe Works
Chickpea flour toasts quickly in the air fryer, creating a crisp, nutty crust without deep frying. A little oil helps browning, while the air fryer’s circulating heat keeps the coating crunchy.
Pounding the chicken to an even thickness solves the most common chicken-breast problem: dry edges and an undercooked center. A quick rest after cooking keeps the juices where they belong.
- Crispy chickpea crust with simple seasonings
- Even cooking thanks to consistent thickness
- Minimal mess: no splattering skillet, no oven preheat
Ingredients You’ll Need
These amounts are written for 2 servings, but you can scale them up as long as you don’t crowd the basket.
- 2 boneless, skinless chicken breasts (about 6–8 oz each)
- 1/2 cup chickpea flour
- 1/4 cup grated Parmesan (optional, for extra crisp and savory flavor)
- 1 tsp kosher salt
- 1 tsp smoked paprika
- 1/2 tsp garlic powder
- 1/2 tsp onion powder
- 1/4 tsp black pepper
- 1 large egg
- 1 tbsp Dijon mustard (optional, helps the coating stick and adds tang)
- 1 tbsp olive oil (or avocado oil)
- Cooking spray (oil spray preferred)
- Lemon wedges, for serving (optional)
If your chicken breasts are very large, plan to cook in batches so the crust actually crisps instead of steaming.
How to Make Air Fryer Chicken Breast with Crispy Chickpea Crust in the Air Fryer
1) Prep the chicken. Pat the chicken dry. If the thick end is much thicker than the rest, slice it horizontally a bit or pound gently between parchment until even (about 3/4-inch thick).
2) Set up the coating stations. In a shallow bowl, whisk chickpea flour, Parmesan (if using), salt, paprika, garlic powder, onion powder, and pepper. In a second bowl, whisk the egg with Dijon mustard.
3) Coat. Dip each chicken breast in the egg mixture, letting the excess drip off. Press into the chickpea flour mixture on both sides, packing the coating on firmly. Drizzle or brush the tops with the olive oil (a thin layer helps browning).
4) Preheat and prep the basket. Preheat the air fryer to 380°F for 3 minutes (if your model preheats). Lightly spray the basket with oil spray.
5) Air fry. Place chicken in the basket in a single layer with space around each piece. Spray the tops lightly with oil spray.
6) Flip and finish. Cook, flip carefully, then continue cooking until the crust is crisp and the thickest part reaches 165°F on an instant-read thermometer.
7) Rest. Transfer to a plate and rest 5 minutes before slicing. Finish with a squeeze of lemon if you like.
Air Fryer Time and Temperature
For most 6–8 oz chicken breasts pounded to an even thickness, 380°F is the sweet spot: hot enough to crisp the chickpea crust before the chicken dries out.
- Temperature: 380°F
- Total time: 14–18 minutes
- Flip: at 8 minutes
- Doneness: 165°F internal at the thickest part
Time will vary based on thickness and your air fryer model. If your crust browns quickly, drop the temp to 375°F and add 1–2 minutes as needed.
Tips for the Best Results
Dry chicken equals better crust. Patting the surface dry helps the egg layer cling and keeps the coating from sliding off.
Press the chickpea mixture on firmly. Loose coating tends to shed when you flip, so give it a good press on both sides.
- Don’t overcrowd: air needs room to circulate for crispiness.
- Use oil spray (not aerosol cooking spray if your basket is sensitive); a light mist improves browning.
- Flip with a thin spatula or tongs gently to protect the crust.
- Check early: start temp-checking around 12–13 minutes if your breasts are thinner.
Variations and Substitutions
Want to adjust flavor without changing the method? Keep the same coating setup and swap seasonings.
- Spicy: add 1/2 tsp cayenne or chipotle powder to the chickpea flour mixture.
- Italian-style: add 1 tsp dried Italian seasoning and serve with marinara.
- No Parmesan: skip it for a dairy-free option; add 1 tbsp nutritional yeast for savory flavor if desired.
- Egg-free: use 3 tbsp mayo thinned with 1 tsp water, or plain yogurt if dairy is fine.
- Chicken cutlets: thin cutlets cook faster; start checking at 10 minutes total.
What to Serve With It
This chicken works like a crispy main for salads, bowls, or classic sides. Keep sides simple so the chickpea crust stays the star.
- Garlic green beans or roasted broccoli
- Simple arugula salad with lemon vinaigrette
- Rice or quinoa with herbs
- Air fryer sweet potato wedges
- Quick cucumber-tomato salad
For another easy side idea, see Air Fryer Recipes.
Storage and Reheating
Store leftovers in an airtight container in the fridge for up to 3–4 days. The crust will soften in the fridge, but it crisps back up well.
To reheat, warm in the air fryer at 350°F for 4–7 minutes, flipping once, until heated through. Avoid microwaving if you want the chickpea crust to stay crisp.
For more air fryer reheating tips, check Air Fryer Reheating Guide.
FAQ
Can I use canned chickpeas instead of chickpea flour?
Not for this crust. Whole chickpeas won’t form a dry, even coating the same way; chickpea flour is what creates that crackly, toasted exterior.
Why is my chickpea crust not getting crispy?
The most common causes are overcrowding (steam builds up) and not using a light mist of oil. Make sure there’s space around the chicken and spray the top lightly before cooking.
Do I need to preheat the air fryer?
Preheating helps the coating set quickly and reduces sticking, especially with breading-style recipes. If your model doesn’t preheat, just add 1–2 minutes to the cook time and check doneness early.
How do I keep the coating from falling off when flipping?
Press the chickpea mixture on firmly and let the chicken sit for 3–5 minutes after coating so it hydrates slightly and adheres. Flip gently with a thin spatula and support the chicken as you turn it.
Can I make this ahead for meal prep?
Yes—cook, cool, and refrigerate. Reheat in the air fryer to bring back the crispiness, then slice and add to salads or grain bowls.


